How to use Sayl Retail webhooks with Google Sheets
In this article we will explain to you how you can set up a webhook with Google Sheets. You can use Google Spreadsheets as to add invoices or any other detailed order you would wish to add.
The first thing that you'd have to do is log in to your gmail account and open up a new tab in the search bar and type in: "drive.google.com". On the new page, you will see a button on the left upper corner which says: "New". You'd have to click on that to access a new spreadsheet. Now you have a blanco spreadsheet which you can use.
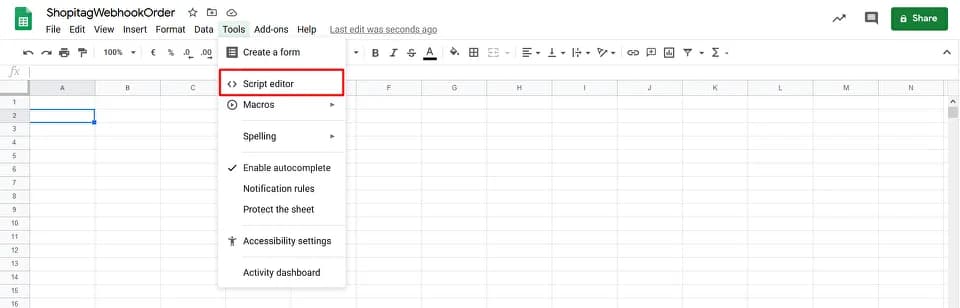
Afterwards you have to give a new name to the spreadsheet, we'll call it: "SaylRetailWebhookOrder". Then you go to the tab "Tools" and select "Script Editor". A new page will pop up called "Untitled project".
Now it is time to develop!
In the Untitled project you add:
//this is a function that fires when the webapp receives a GET request
function doGet(e) {
  return HtmlService.createHtmlOutput("get request received");
}

//this is a function that fires when the webapp receives a POST request
function doPost(e) {
  try {
    var params = JSON.stringify(e.postData.contents);
    params = JSON.parse(params);
    var myData = JSON.parse(e.postData.contents);
    var customer_firstname = myData.customer_firstname;
    var customer_lastname = myData.customer_lastname;
    var customer_email = myData.customer_email;
    var customer_phone = myData.customer_phone;
    var comment = myData.comment;
    var price_total = myData.price_total;

    // try statement needed because no invoice data triggers an error
    try {
      var invoice_address = myData.invoicing_address;
      var invoice_company_name = invoice_address.company_name;
      var invoice_vat = invoice_address.vat;
      var invoice_street = invoice_address.street;
      var invoice_number = invoice_address.number;
      var invoice_zip = invoice_address.zip;
      var invoice_city = invoice_address.city;
    } catch(err) {
      var invoice_company_name = "no invoice";
      var invoice_vat = "";
      var invoice_street = "";
      var invoice_number = "";
      var invoice_zip = "";
      var invoice_city = err;
    }

    var sheet = SpreadsheetApp.getActiveSheet();
    var lastRow = Math.max(sheet.getLastRow(),1);
    sheet.insertRowAfter(lastRow);
    var timestamp = new Date();
    sheet.getRange(lastRow + 1, 1).setValue(timestamp);

    // Separate test data from production data
    sheet.getRange(lastRow + 1, 2).setValue("Real Order");

    // Json data output for debug reasons, you can delete this
    sheet.getRange(lastRow + 1, 3).setValue(myData);

    sheet.getRange(lastRow + 1, 4).setValue(customer_firstname);
    sheet.getRange(lastRow + 1, 5).setValue(customer_lastname);
    sheet.getRange(lastRow + 1, 6).setValue(customer_phone);
    sheet.getRange(lastRow + 1, 7).setValue(invoice_company_name);
    sheet.getRange(lastRow + 1, 8).setValue(invoice_vat);
    sheet.getRange(lastRow + 1, 9).setValue(invoice_street);
    sheet.getRange(lastRow + 1, 10).setValue(invoice_number);
    sheet.getRange(lastRow + 1, 11).setValue(invoice_zip);
    sheet.getRange(lastRow + 1, 12).setValue(invoice_city);
    sheet.getRange(lastRow + 1, 13).setValue(comment);
    sheet.getRange(lastRow + 1, 14).setValue(price_total);

    // Json data output for debug reasons, you can delete this
    sheet.getRange(lastRow + 1, 15).setValue(invoice_address);
  } catch(err) {
    var sheet = SpreadsheetApp.getActiveSheet();
    var lastRow = Math.max(sheet.getLastRow(),1);
    sheet.insertRowAfter(lastRow);
    var timestamp = new Date();
    sheet.getRange(lastRow + 1, 1).setValue(timestamp);
    sheet.getRange(lastRow + 1, 2).setValue("Error" + err);
  }

  var emailAddress = "yourname@gmail.com";
  var subject = "Sayl Retail Order Result";
  var message = params; //"Sending emails from a Spreadsheet";
  MailApp.sendEmail(emailAddress, subject, message, {
    name: 'Yourname - Sayl Retail'
  });

  SpreadsheetApp.flush();
  return HtmlService.createHtmlOutput("post request received");
}
Of course you can experiment and change some statements to fit your needs. At the moment, you can save the application by going to the menu and selecting save. You can save it under the project name: "SaylRetailWebhookOrder".
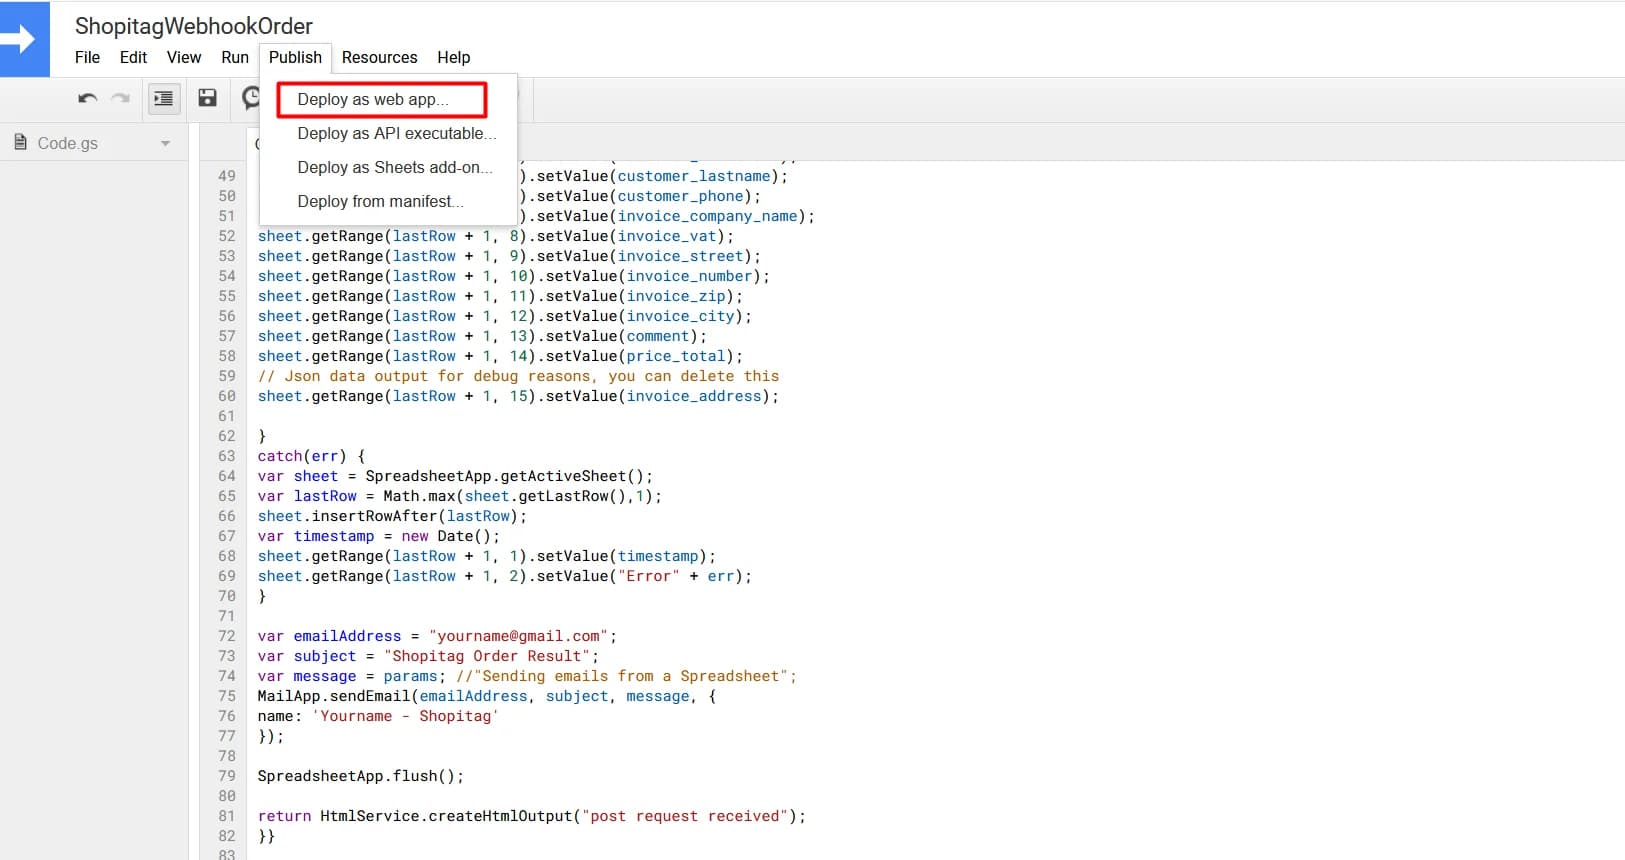
Next, you select "Publish" and click on "Deploy as a web app...". Execute as me (authorization is needed). You can select who has access, you need to click on it and you'll see a list and then u choose: "anyone, even anonymous".
Now let's head on over to Sayl Retail.
You'll see "Settings" in the left menu on the admin page. Once you've clicked on it and chosen "Webhook settings", you'll be able to add in the tab next to "New Order":
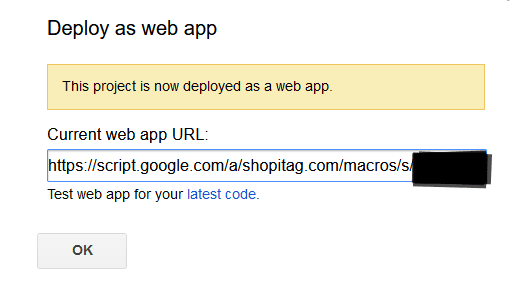
https://script.google.com/a/*yourdomain*/macros/s/*yourkey*/execfor a Google Workspace account, and:https://script.google.com/macros/s/*yourkey*/execfor a usual Google account.
The key will be the last few letters which you'll find once you've deployed it as a web app on the Untitled page. (There will be a pop-up - see below).
If everything has worked out, you can click save on Sayl Retail and there will be a popup on top "webhook saved succesfully".